|
12. LEDs
TTwo light emitting diodes are used in a typical gun.
- An infrared LED, which produces the energy that is transmitted at
the target. This is a high-powered model, with a tight beam. We suggest
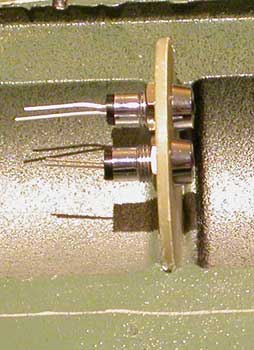
mounting it in a "bezel". This is a metal housing
that allows the led to be screwed into a mounting hole. This also provides
some heat dissapation which aids in the lifetime of the led. The infrared
led must be aligned exactly with the centre of the lens (refer to lens
section)
- A red LED that simulates the appearance of "muzzle flash."
This is used so that when you shoot at somebody, they see a bright flash
from your gun. This enhances realism and fun, but may not be allowed
in all countries for safety reasons.
The infrared LED should be considered a "consumable" component,
in that they will eventually wear out and require replacing. For this
reason the LED should be mounted in such a way that permits it to be changed
easily. We suggest using a 2 pin connector to slide over the end of the
LED legs, instead of soldering directly to the legs.
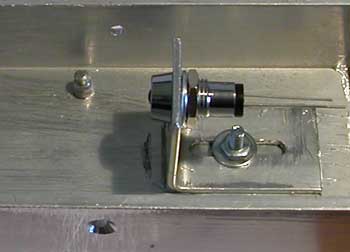
Example LED mounting:
Its is preferable to mount the infrared led on an adjustable mount, so
that it can be moved to get the correct focus (refer to lens section for
details about focusing.) This is not essential, but if its not adjustable
then care must be taken to mount it in the correct position.
The Infrared LED that we use (and many others) is the TSAL6100 from Vishay.
This is a high powered, tight angle, efficient model that suits the job
very well.
Both LEDs must be fitted with a resistor in series, to limit the current
going to them. If the current is too high then the LED will burn out.
Refer to the FragTag Mainboard user's manual for details about the size
of the resistor and how to wire it up. Basically the higher the fire rate,
the lower the current needs to be to prevent burning it out (and hence
a higher value resistor needs to be used.)
|